I am a quasi-hobby independent Stampin' Up! demonstrator. I do not book parties but I specialize in one on one instruction plus I still wanted a space to show off my cards and share advice about stamping and papercraft. Enjoy! All stamped images and paper are (c) Stampin' Up.

Shop Now

Click here to shop Stampin' Up. You can order stamps and supplies without having a party and still get Stampin' Rewards.

Sunday 17 December 2023

December's Sunday Sketch

It's been a while since I posted a Sunday sketch. It's been a puzzler to me how unproductive 2023 has been for me, but I recently had some clarity--life is much better when your body isn't fighting a dying tooth :-P

Stay tuned for the finished cards, which uses the Rocking Horse photopolymer stamp set.

Sketch of a rocking horse Christmas card


Your Friend, Christine

Monday 13 November 2023

Time for the Seasonal Sale!

Hey! I'm still here--just not in cardmaking mode, which has me somewhat confused. I'm focusing on a few other things at the moment, including my health. But I popped in to tell all y'all about Stampin' Up's seasonal sale.

It's a great time to replenish your paper, ink and stash of trims from the Annual Catalogue:

⭐ 10% off ribbons and trims
⭐ 15% off inks, including pads, refills, markers, and Blends
⭐ 20% off papers, including cardstock, specialty paper, and DSP


The sale only runs from November 14-16 and items will not be available for backorder if stock runs out. Shop with me online!


Your Friend, Christine

Tuesday 23 May 2023

STAMP CAMP!

So, back in the Before Times, long, long ago in 2019, I set an idea in motion--STAMP CAMP! I would rent a hall, set up a tool table and invite friends and their friends for a fun day of crafting in June 2020.

I daydreamed about projects, collected loot bag items, booked the hall, bought tablecloths and envisioned happy stampers enjoying a day of togetherness, learning, and fun. These visions buoyed me as I planned everything down to the last detail.

Well, we all know how 2020 played out! STAMP CAMP still happened, although a little more hastily, online. I reassessed and readjusted plans and it went as well as it could have in light of learning Zoom and rigging up cellphones.

Three years later, I was ready to try again, but on a much smaller scale. I invited all my friends and customers and asked them to invite a +1. The plans were smaller and so was the group, but it was still an awesome time. Cards were made! Techniques were taught! And I was left with a heart so full. Sometimes my favourite thing is simply seeing others enjoy themselves.

And it was so much fun and busy I barely took any pictures, doh! Here are the techniques and projects explored:

  • Sponging demo
  • Tone on tone cards
  • Watercolour pencil demo and cards
  • You be the designer (always fun!)
  • Tri-folder shutter card fun fold
Here are the pictures I did take--I'll try to get some close-ups of the projects I brought home. 

I literally packed up the craft room for the day! Let me say, those 31 Gifts tote bags are awesome. Note to self: book a mini-van cab a day in advance (hubs isn't an earlybird on weekends).
Participants were asked to bring their own scissors, favourite adhesive and anything else to make the day fun. As you can see though, I was prepared for any crafting emergency.

I'm already dreaming about next year!

Your Friend, Christine

Wednesday 26 April 2023

March/April's Stamping Project--Hoppy Easter

As I often like to say, late for this year early for next!

I planned on making a dozen Easter cards as I hinted earlier in a blog post. Only four were delivered, oops.

Six were made with Fresh Freesia and six with Pale Papaya inks and cardstock. Remember Pale Papaya is a departing In-Colour while Fresh Freesia joins the Subtles line. These cards were tricky even though they were sketched out beforehand. I wasn't completely happy with how they looked. Also, silly me, I mismeasured the scalloped pieces. Instead of using the right-size die, I used a slightly smaller one. So not only did I run into design problems, there were technical challenges. It's an inevitable part of the creative process and not always a bad thing.

The sentiment, flowers, and rabbits are stamped with Early Espresso ink. I love the warmth Early Espresso brings to cards because it's not as cool or stark as black. I also used another departing die set for the branches and once I added the branches into my design I liked it a lot more.


Now, Full of Love is a retiring item, but I want to spotlight it, because as a thrifty crafter, I appreciate double duty sets. If you carefully ink the floral parts, you now have eight different edges for borders. The thin line style also coordinates with other thin line stamps in my collection. When looking through the catalogue, think beyond the literal image and you may surprise yourself with all the possibilities!

Supply List for 12 cards
  • Three sheets of 8.5 x 12" Fresh Freesia cardstock
  • Three sheets of 8.5 x 12" Pale Papaya cardstock
  • 1 12x12" sheet of Basic White cardstock or large white scraps
  • Fresh Freesia, Pale Papaya, and Early Espresso inks
  • Full of Love stamp set
  • Easter Bunny stamp set and Bunny Punch
  • Scalloped Contours dies
  • Hand-drawn Dots background stamp
  • Any die set that contains branches
  • Lightweight vellum or white office paper
  • Stamparatus
  • Sponges for inking
  • Chalk pastels or other colour tools
  • Dimensionals and other adhesives
  • Scoring, cutting, and sponging tools

Instructions
  1. Score each sheet of cardstock in half but don't cut the sheets in half just yet.
  2. Stamp with matching ink all over the right side of each sheet using the Hand-drawn Dots background stamp. Stamp on and stamp off to create an overlapping pattern. I stamped more around the bottom edge of the card to create a gradient effect. Once you are happy with your stamping, cut the sheets in half to make 12 bases.
  3. Die cut 12 scallop shapes from the Scalloped Contours set using the 3.25x4.5" die.
  4. Cut 12 2.5x3.75" rectangles from basic white cardstock.
  5. Cut 12 2x3.25" rectangles from basic white card stock.
  6. Sponge the corresponding rectangles with either Fresh Freesia or Pale Papaya ink. Feel free to mix or match as you desire--after all, it's your card :-)
  7. Stamp the edges of the white rectangles, both large and small, with a stamp from Full Of Love, using Early Espresso ink.
  8. Stamp your Easter sentiment in Early Espresso ink, centering it on the smaller rectangle. A stamping platform like the Stamparatus is a great helper here.
  9. Stamp 12 rabbits in Early Espresso ink and punch them out with the coordinating punch. I used chalk pastels to color the rabbits. You can use pencil crayons or watercolour pencils. The fun thing about pastels is that they leave a soft look and you can erase color away to make some interesting patterns and shapes.
  10. Die cut 12 sets of three branches from your chosen set. You can use any die cut set you have on hand which will make a nice silhouette--leaves, branches, flowers, or whatever you like. I used light opaque vellum that I had some scraps of but office paper or scraps of white cardstock also work.
  11. Sponge around the card bases with matching ink. You can even sponge the edges of the scalloped pieces to give them a little oomph!
  12. Now all the pieces are cut and coloured, it's time to assemble them. I found it easy to assemble the scalloped card fronts before attaching them to the base.
I really liked the Easter Bunny stamp set. It's just the right amount of cute and fun for me--sometimes I'm a little picky when it comes to cute and fun :-) It would be super fun to get some tiny googly eyes and put them on the rabbits in the set!

Until next time...

Your Friend, Christine


Friday 31 March 2023

Fresh New Colours for Spring from Stampin' Up!

Along with birds arriving, snow melting, and trees budding--there are plenty of signs the new 2023-2024 Stampin' Up! annual catalogue is approaching along with spring :-D

You may have heard about a colour refresh and what you heard is true--on March 29th, SU revealed what regular line colours will be discontinued and which will be added. It's explained in the video below, but here's a handy list as well:
  • Bermuda Bay
  • Blushing Bride
  • Mango Melody
  • Merry Merlot
  • Mint Macaron
  • Pacific Point
  • Pear Pizzazz
  • Rich Razzleberry
  • Sahara Sand
  • So Saffron
  • Soft Suede

2021-2023 In-Colour Fresh Fresia will join the Subtles line while previous In-Colours from recent years will also return--but that's another blog post!

For now, shop with me online and snag your favourite departing colours in paper, ink, re-inkers, and markers before they're gone!

A colour refresh can be a stressful time for stampers, but this one isn't as drastic as the previous one, although I'm still carrying a torch for Marina Mist! I'm surprised So Saffron is leaving because it's one of my favourite yellows--just yellow enough and is a total workhorse in my cardmaking. Sahara Sand I understand--it's just a touch greyer than Crumbcake.


Is the video too fast for you? Did you know you can change the playback speed of YouTube videos? Depending on your device, playback settings can usually be found under the gear icon or three dot menu.

Stay tuned for more new catalogue fun!
Your Friend, Christine

Wednesday 29 March 2023

February's Stamping Project--Helping Others

LOL, this isn't a mistake that February's project is being posted in March. February, I admit, was a tough month. Not only is it such a blah month, and often a cold one in Calgary, but it felt longer than usual as an older family member passed unexpectedly and my attention turned inwards instead of outwards.

I felt extra committed to finishing two projects, though, oe of which was creating a pile of masculine cards for a local charity, Seniors Secret Service. They send out a few hundred birthday cards monthly and I thought it would be fun to make and donate some cards. It turns out they have a need for masculine cards. Masculine cards are always tricky--while earthy and bold cardstock colours are available, the stamps, sentiments, and papers are often missing. I've noticed over the past few years that supply companies, and especially Stampin' Up!, are stepping up to fill this gap.

My friend lent me her scrap box, and I swear another’s person stash is always more interesting than one’s own 😃 It was full of discontinued Stampin’ Up! papers and cardstock which I found super exciting. I busted into my own stash and found some nice kraft cardstock that complemented the Pool Party papers. I cut up some bases, cup up some strips and starting assembling without worrying too much about the layout–-just keeping it simple, you know? I didn’t want to get hung up on the design too much, so I pulled out a current set, Wildlife Wonder. Not only does it have a nice, big bear, but it also has some perfect sentiments such as to a great guy and sending birthday wishes.

I stamped the bear on Very Vanilla cardstock with Early Espresso ink and fussy cut them out. I thought about placing a sentiment on the card, but decided to leave it as is, in case the Seniors Secret Service staff needed the cards for a general hello.

Thinking of others and making something helped me get through February. Every day I reminded myself spring is around the corner and every day truly is getting a little lighter and brighter as spring approaches in her incremental ways.

Masculine bear cards

Until next time...
Your Friend, Christine

Monday 20 March 2023

March's Sunday Sketch--Easter Cards

Today's Sunday sketch has me all excited--and won't be revealed until they're received. I can give you a little hint, however! The cards use these two sets, Easter Bunny Photopolymer Stamps + Punch and Full of Love Cling Stamp Set, pictured below:
Featured stamp sets

This card is going to have a lot of fun layers! Stay tuned!


Your Friend, Christine

Tuesday 17 January 2023

Tuesday Tip--Maximize the Shine!

I started posting Tuesday Tips on Facebook, but in case you don't , you can still enjoy them every third Tuesday of the month.

Today's tip reads: Make the most of metallic papers by boosting elements on dimensionals to create a shadow or reflection.

Tuesday Tip

Until next time...
Your Friend, Christine

Monday 16 January 2023

Happy New Year's Card--Yes, I Send Them :-D

I always laugh and tell people if they didn't receive a Christmas card, they're probably on the list for a new year's one.

Starting Christmas crafts in July isn't a guarantee one will be done in time for the holidays, and, to be honest, once I let go of the pressure to make Christmas cards, I felt so much happier. In fact, I think the new year's cards turned out better than the Christmas ones!

There's no shame in sending a New Year's card--after after Christmas fun, frolic, and feasting, it's kind of nice getting a bonus card in the mailbox IMHO.

These cards started out as Christmas cards but it was easy to change them up. I started with six Basic White and six Very Vanilla cardstock bases.

I used the stamps (as well as dies) from the Christmas Lights bundle and some silver ink to stamp the top and bottom of the bases. Then, I cut up gold and silver metallic dotted paper from the fall Sale-A-Bration freebie DSP pack.

My main goal was using up all the metallic scraps hanging around the craft room and I succeeded! There were enough scraps to make gold, silver, blue and light purple snowflakes large and small. I used all the snowflake dies in my collection by the way.

New Year's stamps aren't super popular, so I saved myself some time by printing a sentiment in a colour close to Early Espresso and cut out each tag.

However, I had a problem--I had big shapes, little shapes, stamped images and DSP--all good things. Something just didn't look right and after chatting with a friend, I decided to add some more snowflakes in matte colours.

Diving into the scrap basket, I found small pieces of Night of Navy, Misty Moonlight, and Purple Posey to die cut. The flat, solid colours tempered the shiny elements.

Lastly, I glued thin metallic strips under the tag to make another reflective surface and make the tag stand out more.

Just like snowflakes, each of the twelve cards were different. Click the image for larger size.

Have a shiny 2023 friends!
New Years Greeting Cards


Your Friend, Christine

Thursday 5 January 2023

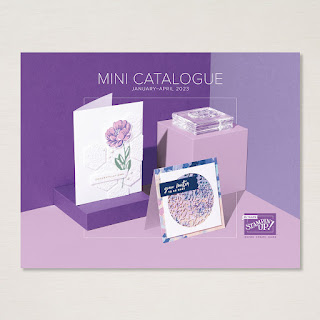
It's Here--The January-April Mini Catalogue and Sale-A-Bration!

Time to celebrate and sale-a-brate the new year with an exciting new catalogue with winter and spring holidays and more! Contact me for a printed catalogue or shop with me online.

January April Mini Catalogue

Don't forget that qualifying orders also earn you free product--stamps, paper or more!


I'll share my new catalogue favourites soon along with a project or two.

Your Friend, Christine

Tuesday 3 January 2023

Some Festive Stragglers :-)

It makes sense that there's a little bit of 2022 coming into 2023! The problem with being so sick is forgetfulness--and somehow I totally forgot about these three designs I made back in...October? I would have liked to make more, but they are just one-offs.

The two cards below use Snowflake Vellum Paper. The catalogue photo didn't do this paper justice in my opinion--it's so pretty! I used some scraps of metallic and glitter cardstock to add snowflakes from older sets.                   


In the horizontal card, you can see where I tried stamping the Basic White Base before putting the vellum on top. I'm not sure how well this worked out, but I would try the technique again. Vellum is perfect for toning down colours or shapes.


Lastly, if you purchased some Boughs of Holly paper, you may have fallen in love with the poinsettia patterns. One sheet in particular offered lots of fussy cutting fun, as you can see here! The Shaded Spruce die cut and stamp are from the Merriest Moments bundle, which features stamps, dies, and an embossing folder. It debuted in 2021 and was actually a returning favourite in the 2022 August-December Mini Catalogue. Returning favourites don't often happen, but sometimes they do :-) I sponged the Shaded Spruce die cut with some Evening Evergreen to tone it done a little. Dots of copper ink complete the festive mood. 


So, for sure that's a wrap on 2022's holiday cards. Time to get ready for the new year because it's going to be time to Sale-A-Brate verrrrrry soon!

Your Friend, Christine