
You may have a pack of vellum in the stash, but have you ever thought about trying different things with it? You may already know that it’s great for layering or toning down a busy background, but its transparent properties can be used in so many other ways!
I encourage you to make your own little sample folder, even if it means sacrificing a sheet to trial and error. Experience is the best teacher, after all. Vellum can be intimidating because of its precious nature. It is easy to mark it in unintended ways, but don’t let that discourage you.
What materials can you use with vellum? Vellum is not as porous as other papers, so it won’t absorb as much moisture as plain paper or cardstock. You can stamp with Memento, Staz-On or SU’s Classic Stampin’ pads. You can even take advantage of vellum’s transparent properties by stamping on both sides, or stamping on one side and colouring on the other. Different inks may take longer to dry on vellum, so don't be too eager to work with the stamped piece right away!
You can draw on vellum with pencil or pencil crayons. Just be careful to watch your pressure—too hard and you may leave an imprint. You can gently shade with the side of a pencil crayon or colour in an area. Watch out for flecks of colour though.
Alcohol markers like Stampin’ Blends work really well on vellum and leave smooth coloured areas. Water-based markers will leave a different effect, but it depends on the size of the area to be coloured. Water-based markers may take longer to dry as the colour sits on top of the paper.
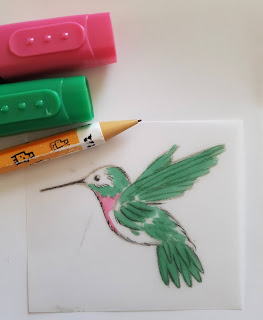
You can combine all the above techniques in one image too! Here I have stamped on one side, coloured with alcohol inks on another side and outlined the image with pencil on the facing side.
You may accidentally bend vellum. It’s almost impossible undo a crease—but you can creatively rip it to make a visually interesting edge or use it as a stencil.
I encourage you to make your own little sample folder, even if it means sacrificing a sheet to trial and error. Experience is the best teacher, after all. Vellum can be intimidating because of its precious nature. It is easy to mark it in unintended ways, but don’t let that discourage you.
What materials can you use with vellum? Vellum is not as porous as other papers, so it won’t absorb as much moisture as plain paper or cardstock. You can stamp with Memento, Staz-On or SU’s Classic Stampin’ pads. You can even take advantage of vellum’s transparent properties by stamping on both sides, or stamping on one side and colouring on the other. Different inks may take longer to dry on vellum, so don't be too eager to work with the stamped piece right away!
 |
| A stamped image on vellum using Gray Granite |
You can draw on vellum with pencil or pencil crayons. Just be careful to watch your pressure—too hard and you may leave an imprint. You can gently shade with the side of a pencil crayon or colour in an area. Watch out for flecks of colour though.
Alcohol markers like Stampin’ Blends work really well on vellum and leave smooth coloured areas. Water-based markers will leave a different effect, but it depends on the size of the area to be coloured. Water-based markers may take longer to dry as the colour sits on top of the paper.
 |
| Click on any of the images for a closer look |
You can combine all the above techniques in one image too! Here I have stamped on one side, coloured with alcohol inks on another side and outlined the image with pencil on the facing side.

You may accidentally bend vellum. It’s almost impossible undo a crease—but you can creatively rip it to make a visually interesting edge or use it as a stencil.
 |
| A torn piece of vellum |
You can mark vellum in a good way! Embossing folders can leave an interesting texture and look on both sides of vellum.

You can punch and die cut vellum too! Here are a couple of punched dragonflies:
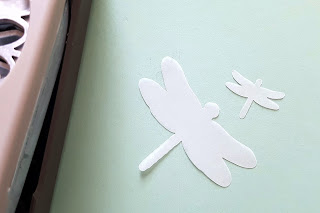
Here is a die cut piece. In my experience, large, solid shapes work well in a die cutting machine as opposed to delicate ones. Delicate dies may need several passes and then still not cut completely.

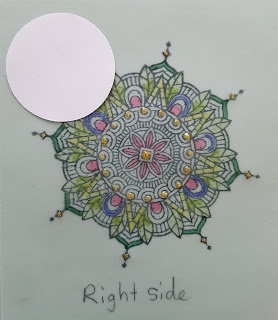
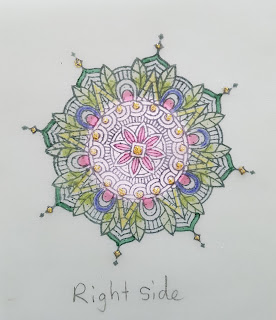
And lastly, layering shapes under vellum can boost the look. For example, a simple punched white circle brings the center of the stamped image to life!
There you have it—a crash course in vellum. Working within the limits of vellum can really add that special touch to a card to scrapbook if you don’t mind a little trial and error first!


You can punch and die cut vellum too! Here are a couple of punched dragonflies:

Here is a die cut piece. In my experience, large, solid shapes work well in a die cutting machine as opposed to delicate ones. Delicate dies may need several passes and then still not cut completely.

And lastly, layering shapes under vellum can boost the look. For example, a simple punched white circle brings the center of the stamped image to life!


There you have it—a crash course in vellum. Working within the limits of vellum can really add that special touch to a card to scrapbook if you don’t mind a little trial and error first!


